This part of the sheet is broken up into several sections: an optional section for handling Stress, and important section for damaging Conditions, a button to mark your Doom and Death, and a place to enter details of your own created conditions.
The entire section is placed in its own div, as usual:
<div class="harm grid-box grid-box">
    <button type="action" name="act_show_xp" class="show-xp title">
        <h2>Hurt & Harm</h2>
    </button>

</div>Code language: HTML, XML (xml)
The heading is a button that works the same as all the others – it shows or hides the advancement fame which hovers over the sheet. It’s not needed most of the time so is often hidden out of the way.
Stress
This takes up a lot of code for an optional trait, but that can’t be helped. The HTML looks like this:
<input type="hidden" name="attr_stress_max" class="" value="5" />
<input type="hidden" name="attr_stress" class="" value="0" />
<input type="hidden" name="attr_stress_show" class="stress-show" value="1" />
<div class="stress">
   <button type="action" name="act_stress" class="Audacity">Stress</button>
   <input type="hidden" name="attr_stress0_show" class="no-click stress-show" value="1" />
   <input type="checkbox" name="attr_stress0" class="no-click stress" value="1" />
   <input type="hidden" name="attr_stress1_show" class="no-click stress-show" value="1" />
   <input type="checkbox" name="attr_stress1" class="no-click stress" value="1" />
   <input type="hidden" name="attr_stress2_show" class="no-click stress-show" value="1" />
   <input type="checkbox" name="attr_stress2" class="no-click stress" value="1" />
   <input type="hidden" name="attr_stress3_show" class="no-click stress-show" value="1" />
   <input type="checkbox" name="attr_stress3" class="no-click stress" value="1" />
   <input type="hidden" name="attr_stress4_show" class="no-click stress-show" value="1" />
   <input type="checkbox" name="attr_stress4" class="no-click stress" value="1" />
   <input type="hidden" name="attr_stress5_show" class="no-click stress-show" value="1" />
   <input type="checkbox" name="attr_stress5" class="no-click stress" value="1" />
   <input type="hidden" name="attr_stress6_show" class="no-click stress-show" value="1" />
   <input type="checkbox" name="attr_stress6" class="no-click stress" value="1" />
   <input type="hidden" name="attr_stress7_show" class="no-click stress-show" value="1" />
   <input type="checkbox" name="attr_stress7" class="no-click stress" value="1" />
   <input type="hidden" name="attr_stress8_show" class="no-click stress-show" value="1" />
   <input type="checkbox" name="attr_stress8" class="no-click stress" value="1" />
   <input type="hidden" name="attr_stress9_show" class="no-click stress-show" value="1" />
   <input type="checkbox" name="attr_stress9" class="no-click stress" value="1" />
</div>Code language: HTML, XML (xml)
It’s written the way it is to take advantage of a CSS property. But first, notice it starts with three hidden attributes. Two of these set the Stress score, which is equal to a character’s Audacity. The third, stress_show, is a special attribute: the stress system is optional, and might not be used in all games. When not used, this whole section is hidden – that is done through CSS.
.stress-show:not([value="1"]) + .stress  {
    display:none;
}Code language: CSS (css)
This code makes the entire stress box vanish and also because of the + operator, makes all stress boxes that aren’t necessary disappear. So, we might see a sheet like this for someone with 4 Stress:
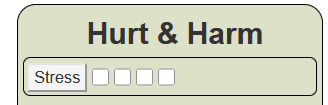
Notice how many checkboxes there are. When the Audacity skill is changed, the number of boxes is revised:
   on('change:audacity_score', () => {
        getAttrs(['audacity_score'], v => {
            const stress_max = int(v.audacity_score);
            const output = {};
            output.stress = 0;
            output.stress_max = stress_max;
            seq(10).forEach(i => {
                output[`stress${i}`] = 0;
                output[`stress${i}_show`] = (i < stress_max) ? 1 :0
            });
            setAttrs(output);
        });
    });Code language: JavaScript (javascript)
Whenever audacity changes, the stressX_show attribute for stress X is updated. And then current stress can be changed whenever you click the Stress button. That button does a lot more, but here’s the code for it.
    on('clicked:stress', v => {
        getAttrs(['stress', 'stress_max', 'character_name'], v => {
            const score = int(v.stress);
            const max = int(v.stress_max);
            const name = v.character_name;
            const output = {};
            startRoll('!{{how_much=[[?{How Much Stress?|0|1|2|3|4|5|6|7|8|9|10}]] }}', stress_roll => {
                const inflicted = int(stress_roll.results.how_much.result)
                const total = score + inflicted;
                let conditions =  int(total / (max + 1));
                let pips = total < max ? total : Math.max(0, total % (max + 1));
                output.stress = pips;
                seq(10).forEach(i => output[`stress${i}`] = i < pips ? 1 : 0);
                setAttrs(output);
                const roll_string = `{{${name} suffers ${inflicted} Stress ${conditions ? `and takes ${conditions} Condition${conditions > 1 ? 's' : ''}`: ''} }}`;
                startRoll(`&{template:default} ${roll_string}`, display => {
                    finishRoll(display.rollId);
                });
            });
        });
    });Code language: JavaScript (javascript)
We start by grabbing some things already recorded in the character sheet – current stress, the max, and the character’s current name (remember, this can change). Then we have this line:
startRoll('!{{how_much=[[?{How Much Stress?|0|1|2|3|4|5|6|7|8|9|10}]] }}', stress_roll => {Code language: JavaScript (javascript)This initiates custom roll parsing, and we ask how much stress is inflicted. This must be in the format of a roll template number (use {{ }} to enclose it, and [[ ]] around the number itself). We also throw in a ! character to ensure this doesn’t get printed out to chat.
                const inflicted = int(stress_roll.results.how_much.result)
                const total = score + inflicted;Code language: JavaScript (javascript)
With inflicted, we get the amount entered into the query box. You can do all sorts of queries in this way, but they must always be in the form of a number. Then we add it to current stress to find total damage at the moment.
If damage goes above stress_max, then only the excess is displayed on the character sheet. So we need to perform some calculations.
                let conditions =  int(total / (max + 1));
                let pips = total < max ? total : Math.max(0, total % (max + 1));
                output.stress = pips;
                seq(10).forEach(i => output[`stress${i}`] = i < pips ? 1 : 0);
                setAttrs(output);Code language: JavaScript (javascript)
Here we find the total number of conditions, the stress left over from however many times the stress was exceeded. We can save the current stress, but we need to print out the number of conditions. So we trigger a second roll, but ths time there is no actual roll – it’s just text sent to chat:
                const roll_string = `{{${name} suffers ${inflicted} Stress ${conditions ? `and takes ${conditions} Condition${conditions > 1 ? 's' : ''}`: ''} }}`;
                startRoll(`&{template:default} ${roll_string}`, display => {
                    finishRoll(display.rollId);
                });
            });
        });
    });Code language: JavaScript (javascript)
The finishRoll function is just there to end the roll speedily – it doesn’t do anything. The actual template used for the chat output could easily be changed for a more consistent appearance.
And that’s it, some pretty complex code in the end. The rest of this section of the sheet is much simpler.
Marking Conditions
There are six conditions, but you can take 5 in any adventure and then you are Doomed. So we need a way to mark each Condition, count those currently marked, and hide or display the Doomed status.
The HTML for conditions and doom are as follows:
<div class="conditions">
    <input type="hidden" name="attr_colouring" class="colour" value="1">
    <input type="hidden" name="attr_hurt" class="toggle" value="0">
    <button type="action" name="act_hurt" class="marked">Glancing</button>
    <input type="hidden" name="attr_maiming" class="toggle" value="0">
    <button type="action" name="act_maiming" class="marked">Maiming</button>
    <input type="hidden" name="attr_sacrifice" class="toggle" value="0">
    <button type="action" name="act_sacrifice" class="marked">Sacrifice</button>
    <input type="hidden" name="attr_concede" class="toggle" value="0">
    <button type="action" name="act_concede" class="marked">Concede</button>
    <input type="hidden" name="attr_exile" class="toggle" value="0">
    <button type="action" name="act_exile" class="marked">Exile</button>
    <input type="hidden" name="attr_intervention" class="toggle" value="0">
    <button type="action" name="act_intervention" class="marked">Intervention</button>
</div>
<input type="hidden" name="attr_doom" class="doom-show" value="0">
<div class="doom">
    <input type="hidden" name="attr_colouring" class="colour" value="1">
    <input type="hidden" name="attr_doomed" class="toggle" value="0">
    <button type="action" name="act_doomed" class="marked">Doomed</button>
    <span name="attr_doom_string"></span>
</div>Code language: HTML, XML (xml)
Ignore the colouring attribute – it doesn’t get used till later.
So here we have pairs of elements, and attribute and a button. We have added the condition names to the tabs routine, so by clicking the button, their value is toggled between 0 and 1. When set to 1, the button is set a different colour, showing it has been clik3ed. (Later, we’ll add some text sent to chat, so everyone can see when a player clicks a condition).
We also set a toggle so when doom is ready, the conditions are hidden and the doom button is visible and can be clicked. This is the code that arranges that.
on(changes(conditions), () => {
    getAttrs(conditions, v => {
        const sum = conditions.reduce((all, one) => all + int(v[one]), 0);
        const output = {};
        output.doom = sum >= 5 ? 1 : 0;
        const filtered = conditions.filter(c => v[c] >= 1);
        const doom_string = `You have used ${filtered.join(', ')}`;
        output.doom_string = doom_string;
        setAttrs(output)
    });
});Code language: JavaScript (javascript)
Since whenever a condition is clicked, its named attribute changes from 0 to 1, we can simply count up the clicked conditions. If they total 5 or more, doom is set to 1.
The tricky part is building up a list of those conditions already used. This where the JavaScript function filter comes in handy. We use it to check the value of each condition, and if 1 (true), add it to the filtered array. When printing this out, we convert this array into a string, so that the string properly breaks across lines.
And that’s that!
Personal Conditions
When you mark a Condition, you might describe it in away that needs to be recorded. This is a simple rep4eatign section for just that purpose.
The only significant bit of code is this CSS:
.repcontrol[data-groupname=repeating_health] {
    padding: 5px;
}Code language: CSS (css)
This just moves the Add and Modify buttons in a little bit, to line them up with the buttons above.
Conclusions and Moving On
With this part of the sheet done, w have now done almost all of the sheet. Only two sections remain: the Sidebar, and the Special Qualities section. The Sidebar is a grab bag of things that don’t belong anywhere else along with game settings, while the Special Qualities section can change a lot with the game. So we’ll do the Sidebar first, in the next sheet post.
