You’ll often want to present a dropdown list of things for players to pick from. Here’s a potential list of races the GM might offer.
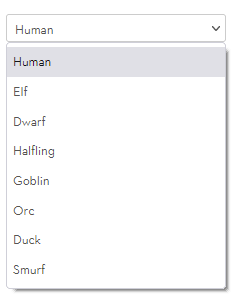
To offer that list, here’s the code using a select element. Notice that you have to give the select a name, just like an input or textarea.
<select name="attr_race">
    <option>Human</option>
    <option>Elf</option>
    <option>Dwarf</option>
    <option>Halfling</option>
    <option>Goblin</option>
    <option>Orc</option>
    <option>Duck</option>
    <option>Smurf</option>
</select>Code language: HTML, XML (xml)
When you have a select, the chosen option becomes the value of that select. So in this case @{race} can have a limited number of values, including Human, Dwarf, and Elf. The player can choose only from the listed options, so this is a great way to present a limited selection of options.
It also blocks players from entering anything else – only the listed options are accepted. This is often a benefit for players- it helps them avoid typos.
Default Value
It’s a good idea to set a default value. While the first box is apparently selected, it might not be actually selected until the player manually selects an entry. You can simply enter selected in an option to make it the default item. Say the GM wanted Goblin to be the standard, default race. They could do this:
<select name="attr_race">
    <option>Human</option>
    <option>Elf</option>
    <option>Dwarf</option>
    <option>Halfling</option>
    <option selected>Goblin</option>
    <option>Orc</option>
</select>Code language: HTML, XML (xml)
Asking The Player to Choose
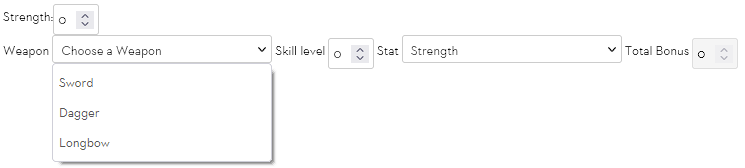
There are times you’ll want to prompt the player to pick an option from the select dropdown. If you put the properties selected disabled hidden on an option, it will be displayed until the player chooses a value, like this.
The code for that might look like this:
<span>Strength:</span><input type="number" name="attr_strength" value="0">
<br>

<span>Weapon</span>
<select name="attr_weapon">
    <option value="none" selected disabled hidden>Choose a Weapon</option>
    <option>Sword</option>
    <option>Dagger</option>
    <option>Longbow</option>
</select>
<span>Skill level</span>
<input type="number" name="attr_weapon_attack" value="0">
<span>Stat</span>
<select name="attr_weapon_stat">
    <option value="@{strength}" selected>Strength</option>
    <option value="@{dexterity}">Dexterity</option>
</select>
<span>Total Bonus</span>
<input type="number" name="attr_weapon_total"
   value="@{weapon_attack}+@{weapon_stat}" disabled>Code language: HTML, XML (xml)
Displayed Labels with Different Values
This picture above also shows an Autocalc where the player enters a skill level, chooses which stat governs their weapon, and the total of those values is automatically calculated.
The second select shows how this is done. You can have a value that is different from the displayed label. It’s very common to use option values when you want to display a friendly label, while the value is actually a number or attribute.
optgroup

You have an option to break up long lists, like this example from the Free Space sheet. The code would look something like this:
<select name="attr_type">
    <optgroup label="Player">
        <option>Free Spacer Crewmember</option>
        <option>Contingency type Corvette</option>
    </optgroup>
    <optgroup label="Gamemaster">
        <option>Sophont Log</option>
        <option>Composite Sophont Log</option>
        <option>Swarm Log</option>
        <option>Creature Log</option>
    </optgroup>
</select>Code language: HTML, XML (xml)
OptGroups are containers; you supply a label and that gets shown to the player. But it can’t be clicked – it’s not something you can select.
Unfortunately, there’s a big problem with OptGroups – they don’t show up when making a custom sheet. They only show up once published to Roll20. So you can create them but you can’t see them while testing. This has to be a bug, and will hopefully have been fixed by the time you read this.
A Note on Gender
You can’t use a select or radio input to have a limited number of options – Roll20 requires that this be a text input, so players can enter any gender they feel comfortable with.
DATALIST
Select is great for presenting a list of limited options. But what if you want to present a list where players can add their own items from the list. Where the dropdown is a guideline or list of suggestions but the players can choose something different.
For example, you might have a list of backgrounds in the game but players can create new ones and enter those. You can’t do that with a select. This is where a datalist comes in.
A datalist is a special kind of input, so make sure you have read Inputs and Attributes.
Create a datalist with an id to name it. Then create your input, and give it a list attribute with exactly the same name as the id.
You create an input as normal with one addition: add a list HTML attribute id. Then create a datalist with the same id.
<datalist id="backgrounds">
    <option>Aristocrat</option>
    <option>Knight</option>
    <option>Smuggler</option>
</datalist>

<input type="text" name="attr_background" list="backgrounds">Code language: HTML, XML (xml)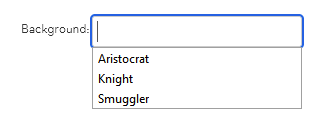
Then when the player clicks the input, they’ll get the dropdown list. There is one complication (on Firefox): the dropdown only appears if the input is already selected when you click it. So you might need to click it twice – once to select the input and a second time to show the list.
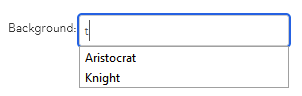
One nifty thing about datalists is that the list is dynamic – as the player enters text, the visible dropdown will change to show only items that contain that letter. Here the player has entered the letter t, and so Smuggler isn’t shown.
