I’ve created a roll20 sheet for my Legends Never Die! game and you can learn how to use it in its page at the Roll20 Wiki. The people at Roll20 have graciously added the game, so when creating a new campaign and picking the character sheet, just start typing Legends Never Die in game system selection and you’ll get a sheet like this.
This post isn’t a “how to use the sheet” – for that, the wiki page linked above is better (and will be expanded). In this post, we’ll look at some techniques on the sheet which you might want to copy for your own sheet.
CSS Grid For Layout
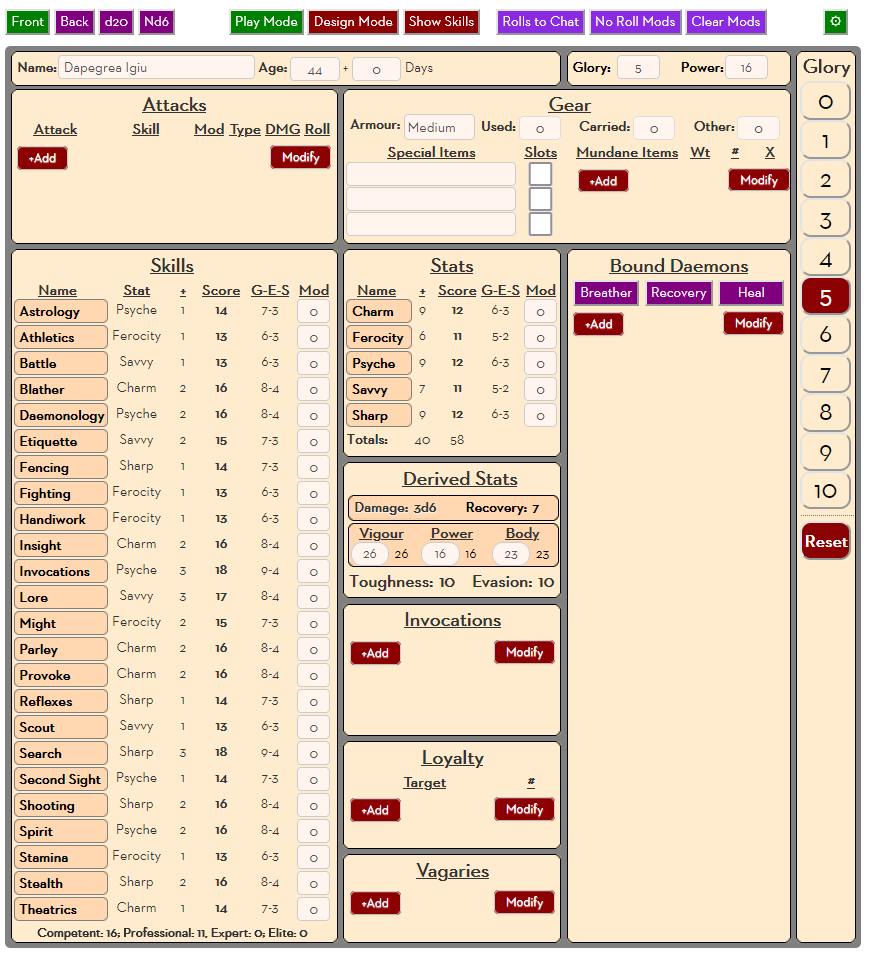
You can see the sheet is laid out using a grid. In fact, it uses two slightly different grids – one for when in play mode, and one for when in design mode where the heights of some rows are different.
This sheet uses grid-area. Each div is given a grid name like this:
.charsheet .front .numbers {
    grid-area: numbers;
}
Code language: CSS (css)
That identifies in the the area shown. Note that some grid names appear more than one, like skills is 5 rows deep, and numbers is the whole height.
This means that those blocks will be spread across several rows. See in the above image how skills takes up severak rows, and bound daemons (grid-area: demon) takes up even more.
Finally, align-content is used to make sure the contents of a grid area slide to the start, and aren’t spread across the grid item. Trust me, you don’t want that.
oh, grid-auto-rows would like grid-template-columns, but sets the height of rows. auto is used to allow some items to expand as needed, while a fixed height is used for those which don’t expand.
.front {
    display: grid;
    grid-template-areas:
        "bio      bio       glory    numbers"
        "creation creation  creation numbers"
        "attacks  gear      gear     numbers"
        "skills   stats     demon    numbers"
        "skills   derived   demon    numbers"
        "skills   power     demon    numbers"
        "skills   loyalty   demon    numbers"
        "skills   vagary    demon    numbers"

        ;
    grid-template-columns: 300px 200px 205px 30px;
    grid-auto-rows: 35px auto auto 190px 135px auto auto auto;
    align-content: start;
    column-gap: 5px;
}Code language: CSS (css)
Changing Style Sometimes, But Not Always
It’s a very common method on roll20 to conditionally change the styling of something. Sites elsewhere might suggest using javascript (jQuery) for this, but we don’t have that option on rll20 so we have to use more basic tricks. You have to do all of the following:
- Create an input whose value we will check. That input is often type=hidden.
- The input has a name and a value. The name so the chaacter sheet can store the value.
- We need to give that input a class, so it is detectable in CSS.
- Then we need to build a CSS string which uses the class and the value. That looks like:
.toggle[value="design"] ~ .front {
    grid-template-areas:
        "bio      bio       glory    numbers"
        "creation creation  creation numbers"
        "skills   stats     demon    numbers"
        "skills   derived   demon    numbers"
        "skills   power     demon    numbers"
        "skills   loyalty   demon    numbers"
        "skills   vagary    demon    numbers"
    ;
    grid-auto-rows: 35px auto auto 135px auto auto auto;
}
Code language: CSS (css)
This is how the grid changes based on whether the sheet is in play mode or design mode. Notice only those items that change area used. The rest are already defined.
The code checks the input which is given a class=”toggle” and grabs the value of that input. When it equals “design”, it applies that style to the element which has a class=”front”.
You can use this method to apply any kind of styling. In other areas of the sheet it is sometimes used to hide entire divsm or to change the color of objects.
The Glory Sidebar
The Glory sidebar looks like a set of numbers, but actually it’s a set of action buttons. When you click one, the current Glory score changes. Then some colouring is applied based on the current value of Glory.
The sheet workers needed:
// first create an array of the glory numbers
const glory_range = [0, 1, 2, 3, 4, 5, 6, 7, 8, 9, 10];
// then check every glory button
glory_range.forEach(i => {
   on(`clicked:glory_${i}`, () => {
      const output = {};
      output.glory = i;
      setAttrs(output);
   });
});
/* the above worker changes the glory value when a button is clicked.
The worker below sets a hidden input to value 1 or 0. there is a separate input for each glory div. it's used to set that box's colour. */
on('change:glory', () => {
   getAttrs(['glory'], v => {
      const glory = +v.glory || 0;
      const upper_limit = 10;
      const output = {};
      if(glory > upper_limit) output.glory = 10;
      glory_range.forEach(i => {
         output[`glory_${i}`] = (i === glory) ? 1 : 0;
      });
      if(output.glory >= upper_limit) {
         output[`glory_${upper_limit}`] = 1;
      } else if (glory < 0) {
         output[`glory_0`] = 1;
         output[`glory`] = 0;
      }
      setAttrs(output);
   });
});Code language: JavaScript (javascript)
The HTML for the inputs (one for each of glory_0 to glory_10).
<input type="hidden" name="attr_glory_0" class="glory" value="0">
<div class="box">
  <input type="hidden" name="attr_glory_0" class="glory" value="0">
  <button type="action" name="act_glory_0" class="active">
    <span>0</span>
  </button>
</div>Code language: HTML, XML (xml)
Finally, the CSS to make the colouration work.
.glory[value="1"] + .active {
    background: darkred;
    color: white;
}Code language: CSS (css)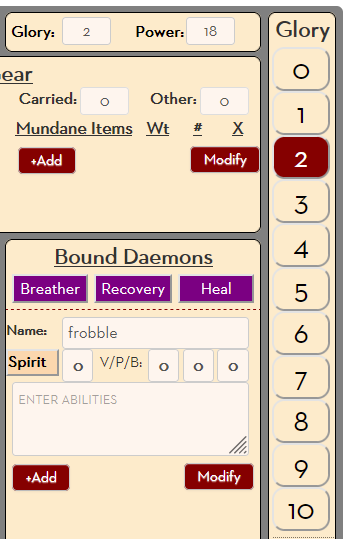
Notice how this rule uses + instead of ~. This means it looks for the element with the active class name that imemdiately follow an element with the class glory. Since it matches only the very next element of that class, it means you can use the same classname many times. This is handy in a lot of situations.
The sheet also uses it to hide untrained skills (and to show them id desired). It is a very useful technique.
Whispers Popup Can Be Enabled or Disabled
Sometimes you want to whisper a message to the GM, or the GM might ask for a secret roll.
Normally when you send a whisper, you’ll include that instruction at the start of a roll:
/w GM I rolled [[1d20+6]]Code language: Markdown (markdown)/w is one of several Text Chat commands. Let’s so you have a button to send that message.
<button type="roll" name="roll_test" value="/w GM I rolled [[1d20+6]]"><button>Code language: Markdown (markdown)But what if you don’t always want to roll that.
<input type="text" name="attr_whisper" value="/w GM ">
<button type="roll" name="roll_test" value="@{whisper}I rolled [[1d20+6]]"><button>Code language: Markdown (markdown)
Since Roll20 will grab the value when the button is clicked, that iwll filled in automatically. That allows someone to type the text in manually and delete it if not whispered, but that is tedious. How about?
<input type="hidden" name="attr_whisper" value="?{whispered?|No, |Yes,/w GM }">
<button type="roll" name="roll_test" value="@{whisper}I rolled [[1d20+6]]"><button>Code language: Markdown (markdown)
This takes advantage of the way HTML ignores leading spaces. When you select No, a space is entered at the start of the statement which is then ignored.
Note that reversing the order doesn’t work. If you try this ?{whispered?|Yes,/w GM |No, } it prints out No. The Yes option must be last.
The LND sheet uses a button on the sheet which uses javascript to change the whisper value. This is essentially what it does:
on('clicked:whisper_on', () => {
   const whisper = '/w GM ';
   setAttrs({whisper});
});
on('clicked:whisper_off', () => {
   const whisper = '';
   setAttrs({whisper});
});Code language: JavaScript (javascript)
That’s not exactly what it does. It has a single button and toggles beween them, but you see what it is doing here – it is setting the value of the whisper attribute, which is then used by the button.
The big advantage of an approach like this is you can use the same attribute in many rolls. You fcould build your rolls using attribute values saved as templates, and streamline your code writing.
Forms Which Popup On Demand
You often want to include information on a character sheet that isn’t needed to be visible all the time. One way to do this is to add extra pages or sub-pages, hidden behind tab buttons. Some sheets have many tabs – for instance, for skills, spells, equipment, and more. These are things which are accessible all the time, but there isn’t enough room on a character sheet to show them all without too much clutter.
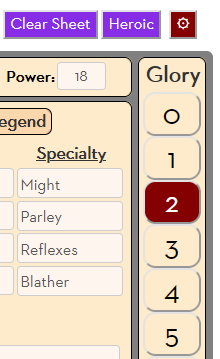
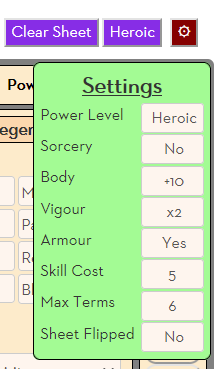
But there are also values you only want to change once in a while. Many sheets have a bunch of settings that might be set once and then left alone. On this sheet, there’s a settings cog at the upper right. Click that, and you get a panel hovering over the sheet.
It obscures the sheet, because it’s only meant to be visible while in use, then click the settings cog again to hide it.
The settings cog is an action button which toggles a hidden input’s value between 1 and 0. That input has a toggle-settings class, and you can see below went it’s value is 0, the settings div is hidden.
.toggle-settings[value="0"] ~ div.settings {
   display: none;
}
div.settings {
    z-index: 999;
    position: absolute;
    left: 670px;
    top: 107px;
}
Code language: CSS (css)
The settings div has a lot of styling, but the important properties to make it visible and position it are shown above.
z-index is what makes it hover over the sheet. A simple z-index: 1 would suffice, but you can go higher.
The others place the div where you want it. See Advanced Positioning for more detail on how to do that.
This is fairly basic for old hands of Roll20 sheet design, but is a very handy technique to use.
Custom Roll Parsing For Yes/No Queries
You can make drastic changes to a character sheet, and create buttons which do that in one click.
Wouldn’t it be nice to give players the option to cancel? To ask them, “Are you really sure you want to do that?”
While Custom Roll Parsing is a new feature intended to combine action and roll buttons, we can also use it to make queries like that.
This is the most novel bit of coding on the sheet, I think. Since the CRP chapter will start soon, I’ll explain how it’s done there.

There are probably other features of the sheet worth describing, but the post is long enough already. I hope you find some useful stuff here. If you want to examine the code directly, it’s on the Roll20 Character Sheet Repo. It’s a bit of a mess though!
