The Bio Section
Setting up the Portrait
The Bio or Description section is interesting because it includes a character portrait. I get that built first.
In the Castle Falkenstein rulebook, character art is often presented in that oval style that used to be popular, and I want to emulate that style.
This turns out to be easy to do in CSS. You just need to border-radius: 50% to an image and make sure no part of the image overlaps the border, and it will create that oval shape.
First I need the HTML. I’m planning to use the new feature in Roll20 that lets you display an avatar image on the character sheet. Read about that here. I only need a single line of HTML for that:
<img name="attr_character_avatar">Code language: HTML, XML (xml)I know this img element is inside a div with class=”description”, so I can target it with .description img. After some trial and error, I end up with this CSS:
.description img {
    width: 145px;
    height: 220px;
    border: 5pt double black;
    object-fit: cover;
    border-radius: 50%;
}Code language: CSS (css)
First I decided on a size (width and height), then added a border, then tried both of the common object-fit selections (contain and cover), and finally added the border-radius property to turn it into an oval portrait.


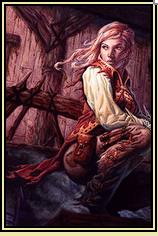
object-fit: contain fits the entire image, but leaves the background to poke through. object-fit: cover ensures that the entire portrait area is used, but parts of the image at the sides are cut off. That works well as long as the character is near the centre of the image – but for characters chosen as portraits, this is probably going to be the case most of the time.
(I reassess that assumption later.)
Finishing the Bio
The rest of the description div is pretty straightforward. Here’s the HTML:
<div class="description">
    <h2>CastlE FalkensteiN</h2>
    <div class="names">
        <h4>Name</h4>
        <input type="text" name="attr_character_name" title="Enter a short name suitable for macros.">
        <h4>Hero Type</h4>
        <select name="attr_hero_type">
            <option value="none" selected disabled hidden>Choose One</option>
            <option>Heroic Hero</option>
            <option>Tragic Hero</option>
            <option>Flawed Hero</option>
            <option>Innocent Heroine</option>
            <option>Clever Heroine</option>
            <option>Tragic Heroine</option>
            <option>Fallen Heroine</option>
        </select>
        <h4>Archetype</h4>
        <input type="text" name="attr_archetype" list="archetypes" placeholder="Choose Archetype">
        <!-- archetypes is a list defined in the old HTML sheet, and doesn't need to be listed here -->
    </div>
    <div class="diary">
        <h4>Diary and Description</h4>
        <textarea name="attr_diary" class="description" placeholder="Write Your Diary and Description"></textarea>
    </div>
    <img name="attr_character_avatar">
</div>Code language: HTML, XML (xml)
As you can see there are 3 main sections – a name and archetype down the left side (div class=”names”), a central area for the diary (div=”diary”), and the portrait on the right (a simple, single-line img).
This could be done with a simple 3-column grid and using grid-column to spread the title (h2) over multiple columns. But it also looks like a great opportunity to use grid-areas, where you give each relevant CSS element a name, and arrange them visually. Here’s the relevant CSS:
.description {
    display: grid;
    grid-template-areas:
        "title title portrait"
        "names diary portrait";
    grid-template-columns: 135px 260px 145px;
    column-gap: 5px;
}

.description h2 {
    grid-area: title;
}
.names {
    grid-area: names;
}
.diary {
    grid-area: diary;
}
.description img {
    grid-area: portrait;
}
Code language: CSS (css)
In the central .description, I add the grid-template-areas, where I define a 3×2 area, and state the title will take the top 2 segments, and the portrait will take the right 2. Then I create those grid areas in the following code.

There’s a bunch more CSS to define the actual sizes of each section and the title font, but the important thing to understand for now is the use of grid-areas. That’s what makes it easy to create the bio section shown here.

