For Sheet Authors, the Custom Sheet Sandbox is one of Roll20’s best-kept secrets. It isn’t technically a secret, since Roll20 gave it a proper announcement, but many sheet authors come to the Roll20 forums without knowing about it. If you aren’t using it when creating a character sheet, you need to start immediately.
Why You Should Use the Sandbox
If you’ve used the old Character Sheet Editor, you’ll be familiar with how slow it was to test things. I’m referring to this page:
You had to do go through this procedure:
- Tweak the code and save it
- Refresh the campaign
- Twiddle your thumbs while waiting for the campaign to load
- Open a character sheet
- And finally, you could check if your code was working.
You could easily go through that many times in a single writing session, while you are testing things to see if they work. By contrast, that process in the Custom Sheet Sandbox is:
- With a campaign open, and viewing a character sheet, save your code changes
- Load a file, and see the character sheet update almost immediately.
It’s hard to describe just how much of a difference this makes, and you’ll realise just how much of a tedious pain using the old system was by contrast.
Use Roll20 For Testing!
Another reason you should use the sandbox:
Many people do their testing in external sites like codepen or jsfiddle. They are great tools – but not for Roll20. There are a lot of built-in styles and custom security in Roll20. The code you try in other places will usually not work properly in Roll20.
The only way to properly test your code is to load it up on a Custom Sheet on Roll20, or use the sandbox. And the sandbox is much faster and easier.
So to repeat, because it’s a very important point:
Do not test Roll20 code anywhere but on Roll20.
Using the Sandbox
You need to do three simple but essential things before you start coding your sheet. They are very simple things which are nevertheless detailed here:

On your hard drive, create a folder to contain all your work. Call it something like Character Sheets.
Then create another folder inside that for each Character Sheet project.
In your project folder, create two new text files, and name them after your game system. If you are making a sheet for the Pendragon system, you might call them pendragon.html and pendragon.css. On Windows 10, that would look like this:

Simple!
The Custom Sheet Sandbox is a special design area on roll20 available to all Pro subscribers. If logged in, you can always reach it with this link: Custom Sheet Sandbox. (Bookmark it!)
Once there you can create a campaign. You’ll be met with this screen:

There are some differences from the normal New Game screen but for now, you can safely ignore almost everything here.
There’s one thing to check. See that Sheet.json Editor section? Jump to Step 3.
Now you want to open the JSON Settings box (just click on it), select anything that appears and delete it all. Then click the Save Changes button. It should be that simple.
Because this is Roll20, what you’ll see in that box if you open it up again can vary. It’s varied while writing this guide! It might be an empty black box, a box containing just green curly braces like this: {}, or the text in the image below. Luckily any of these are fine. If it shows anything else, delete it all and save it again.

The point is to get an empty box, or “legacy”: false setting. It doesn’t matter which. You need that to have the proper CSS settings for the rest of the code in this guide.

Now you’re ready to make your sheet. Launch the game.
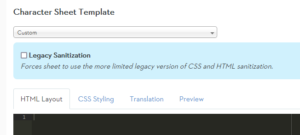
You’ll be treated with a normal, empty campaign, with one difference: the floating form pictured here.
While working on the sheet, write your code in those HTML and CSS files, save the file you are working on, and click one of the buttons here to upload the changes. This uses a familiar file explorer like this:

Your sheet will update instantly. There’s no need to refresh the browser.
You don’t need to worry about Translations until Chapter 7.
You’re Now Ready!
You can now use the Sandbox. It takes longer to describe than to actually do it. You’ll find it very fast in practice. It’s even faster if you use a Syntax-Aware Code Editor (or just Code Editor), which is covered in the next part of the Guide.
Note: The Sandbox Is For Design Only
You can’t invite other players to the Sandbox – it’s purely for testing. It’s great for testing, but once you have your code ready for use, you’ll need to create a campaign with a Custom Character Sheet, and enter your code into the old Sheet Editor.
This isn’t really much of a drawback. Though there will be times you think you are finished and discover while playing that your sheet needs a tweak or two. You will be tempted to go to the Custom Sheet Editor to update the code, and then find one tweak is followed by another, and end up back in the old cycle of making changes, saving, refreshing, and checking.
So it’s best to resist that impulse and make your change on the Custom Sheet Sandbox, where you can perform multiple changes and tests so much faster. Then when finished, you can save it back to the Code Editor.
Roll20 Uploader By Scott C
If you use Chrome or another modern WebKit browser, there’s an extension that looks very useful. You link a folder (your current working folder), and it keeps the files there synced with your Sandbox, so you don’t have to manually upload files. Just work on your hard disk and the sandbox will update automatically.
Sadly, it’s not available for Firefox (my browser of choice), so I haven’t tested it, but it sounds very useful.
