- Setting Up The Handlebars Character Sheet Generator
- Basic Templating with Handlebars
- Handlebars Templating: Things Get Complex
- Handlebars Templating: What are Helpers?
- Handlebars Templating: When You Want to Stop Handlebars
- Handlebars Templating: Nesting in All Its Forms
- Handlebars Templating: Handling Generator Errors
- Handlebars Templating: Helpers
- Handlebars Templating: Partials
You have already seen a lot of Helpers, but in essence, a Helper is a bit of code that you run on top of Handlebars. Handlebars is a templating language that helps to layout a file, and Helpers are functions you can run on top of Handlebars.
This article might be a bit abstract, so there is a bit of code that should be very practical and easy to follow.
Handlebars is nothing without its Helpers. In native Handlebars, you can create custom Helpers, and are encouraged to do so whenever you want some functionality that Handlebars doesn’t provide. This program doesn’t allow you to create custom helpers, but includes the built-in Helpers and a custom library with over a hundred extra Helpers. You have seen some of them already, and many others might be so arcane and limited in scope that you’ll never need them – at least in a Roll20 sheet. But some are invaluable.
Built-in Helpers
You can see the Built-in Helpers in the official docvumentation, but you have seen most of them. I have found the most useful ones to be each, if, unless, and maybe with. Definitely each.
Data Variables
There are also “bits” of data you’ll use a lot, like this, @key, @index, @first, and @last. Extrenely useful is this or {{this}}, as they include the return value of many helpers and functions.
Custom Helpers
There are too many to describe: look in the Helper descriptions to see what is available. By the way, those in the categories fs, html, and logging, aren’t available to us. I don’t think there’s anything in those we would want anyway.
Terrible Documentation
There are many, many custom Helpers, but you won’t find all of them very interesting, and some will be downright impenetrable. You can find a listing of Custom Helpers here, organised into groups by similar function. Be warned though, the documentation there is in a league of its own in just terrible it is.
Many Helpers are very useful (like capitalize or #eq}, but they arem’t always easy to figure out, thanks to that terrible documentation. If you really need to know how a Helper is used, you can look at examples of use: this opens a folder with each group of similar Helpers. When you open one, you can drill down for the helper you are intersted in. Let’s say we look for Capitalize in the string helpers. We’ll find this:
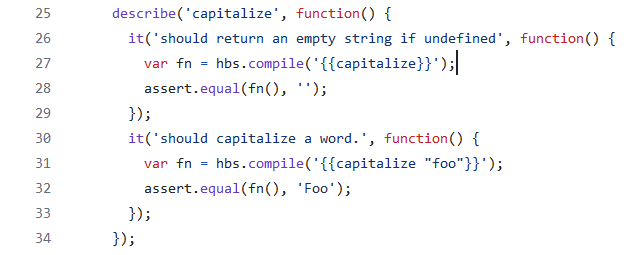
The vast majority of that is useless (and maybe unreadable) to us, but we are looking for this part:

That shows an example of use. It tells us we can type {{capitalise "something"}} and something will be capitalised. From there we can figure out how to use it more generally.
It would be nicer if the documentation was more user-friendly, but we take what we can get, and we can do without most of those Helpers anyway.
What Can a Helper Accept?
Helpers will accept Strings (groups of words, enclosed by quotes if there’s more than one), Numbers, data variables (like @key, @first, @last}, and variables (which can contain any of the previous).
Handlebars works better with Arrays than Objects (or treats Objects as Arrays where possible). It is sometimes worthwhile to convert your data into an array where possible.
You sometimes need to figure out how to use a Helpers output. It might appear to be [object Object] (a clear sign that there’s an object there, and you need to do something to that output to get what you want).
If the output is invalid, it will usually be empty – nothing returned. This means invalid output won’t cause an error. That means your program will run, but you need to figure out the proper syntax to get it to display what you want.
Nesting Helpers
Many Helpers are at their most useful when they are nested inside another Helper. To nest a Helper, use this format:
{{capitalize (itemAt stats 3)}}Code language: Handlebars (handlebars)This will find the 4th item in the stats array (recall that Handlebars starts numbering at 0, so 3 is the 4th item), and then Capitalise it. When nesting, put the thing to be nested inside normal parentheses.
A Special Helper: Repeat
There’s a simple built-in Helper we haven’t covered yet that can be pretty useful. Imagine you have some code that you want to run a set number of times and be mostly identicial during those runs. That might be tedious to type out, and that’s where the Repeat helper comes in.
Let’s say our heroes can have up to 50 hit points (over many levels), and we want to create a checkbox for each individual hit point. This would be a crazy way to handle it, but we can. And with Handlebars, it’s easy.
Let’s say our heroes can have up to 50 hit points (over many levels), and we want to create a checkbox for each individual hit point. This would be a crazy way to handle it, but we can. And with Handlebars, it’s easy.
<div class="hp">
    {{#repeat count=50 start=1}}
    <input type="checkbox" name="attr_HP_{{@index}}" value="1">
    {{/repeat}}
</div>Code language: Handlebars (handlebars)
Creating the basic boxes would be as easy as this, and with some basic CSS, might look like this:
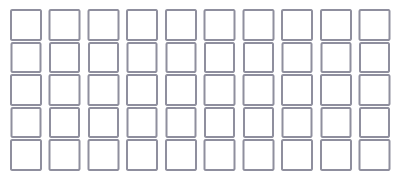
You could easily expand this to 100 or 200 boxes, or even more. Ideally you probably want anything above the character shit points to be hidden, and more, but that’s for a CSS article. With the repeat Helper, you can do whatever you want multiple times.
You must always supply a count and start, or a just a number ({{repeat count=50 start=1}} or {{repeat 50}}). For the latter, remember that Handlebars, like JavaScript, starts counting at 0, so a repeat of 50 would go from 0 to 49. This is why its handy to be able to start your own start and count.
Then use @index to get the current iteration of the loop (as above).
If you wanted to make this practical, you’d probably want to hide all boxes above the current HP total, and that’s something for javascript and CSS – it’ll probably be included soon in a post in Design Patterns.
