- Setting Up The Handlebars Character Sheet Generator
- Basic Templating with Handlebars
- Handlebars Templating: Things Get Complex
- Handlebars Templating: What are Helpers?
- Handlebars Templating: When You Want to Stop Handlebars
- Handlebars Templating: Nesting in All Its Forms
- Handlebars Templating: Handling Generator Errors
- Handlebars Templating: Helpers
- Handlebars Templating: Partials
In this tutorial, we assume you know the basics of authoring a sheet, so we won’t explain HTML, CSS, and JS again. You only need to know some very basic principles about each, but if you need a refresher, look back at The Guide.
Writing Basic HTML
Use the handlebars program to create your HTML, and create the CSS file the normal way. You can include html in a handlebars file with no issue. For example, we start with this bio section:
<div class="bio">
    <span>Name</span>
    <input type="text" name="attr_character" value="">
</div>
<div class="stats">
    <h4>Stat</h4>
    <h4>Score</h4>
    <h4>Buff</h4>
    <h4>Bonus</h4>
</div>Code language: HTML, XML (xml)
We could do with more in that bio section, like places for a description, gender, level, and what not, but the idea is to show you can build sheets using HTML.
We added a section for the attributes, but we’ll build them with handlebars, so for now we just create the headings for each column, and create some basic CSS to arrange the section.
div.stats {
    display: grid;
    grid-template-columns: 100px repeat(3, 50px);
    column-gap: 5px;
}Code language: CSS (css)
We’d probably apply some css to the bio section, too, if we had more in it.
Now we do the following steps:
- Click Generate in the Handlebars Program
- Within the sandbox, load the HTML file
- Still within the handbox, load the CSS since we have added some there.
The final result looks like this:
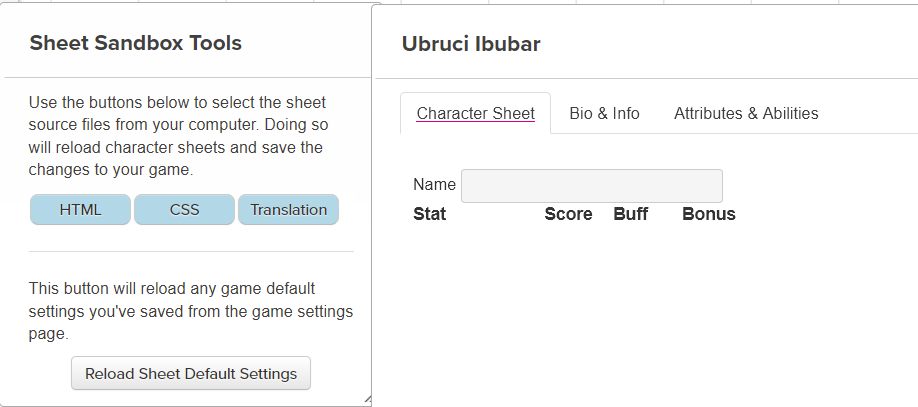
The left shows the sheet sandbox tools – we used the HTML and CSS buttons there. The right shows the current character sheet – we’d need to add some more styling for the bio section, but we aren’t bothering too much with that right now.
The Basic Handlebars Loop with #Each
Now we are ready to create our first Handblears section. If we didn’t use handlebars, we’d need to create something that looks like this:
<div class="stats">
    <h4>Stat</h4>
    <h4>Score</h4>
    <h4>Buff</h4>
    <h4>Bonus</h4>
    <span>strength</span>
    <input type="number" name="attr_strength" value="10">
    <input type="number" name="attr_strength_buff" value="0">
    <input type="number" name="attr_strength_modifier" value="0">
    <span>dexterity</span>
    <input type="number" name="attr_dexterity" value="10">
    <input type="number" name="attr_dexterity_buff" value="0">
    <input type="number" name="attr_dexterity_modifier" value="0">
    <span>constitution</span>
    <input type="number" name="attr_constitution" value="10">
    <input type="number" name="attr_constitution_buff" value="0">
    <input type="number" name="attr_constitution_modifier" value="0">
    <span>intelligence</span>
    <input type="number" name="attr_intelligence" value="10">
    <input type="number" name="attr_intelligence_buff" value="0">
    <input type="number" name="attr_intelligence_modifier" value="0">
    <span>wisdom</span>
    <input type="number" name="attr_wisdom" value="10">
    <input type="number" name="attr_wisdom_buff" value="0">
    <input type="number" name="attr_wisdom_modifier" value="0">
    <span>charisma</span>
    <input type="number" name="attr_charisma" value="10">
    <input type="number" name="attr_charisma_buff" value="0">
    <input type="number" name="attr_charisma_modifier" value="0">
</div>Code language: HTML, XML (xml)
And that would create this:
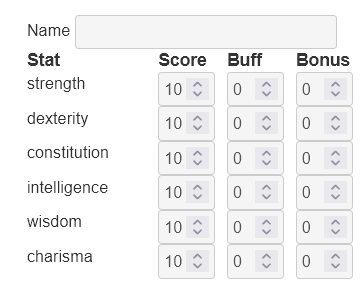
It’s a lot of code to create that section (we’d also want to capitalise those labels – we’ll see how to do that later).
We have here a score that ranges typically from 3-18, gives a bonus, and can be modified by situations, potions, or whatever (the Buff column).
Creating that is doable, but let’s see how much simpler it is with handlebars. The trick is to first recognise where there is repeated code. Here we see the attributes are repeated six times with the only real difference being the attribute name.
So our first step is, in the template.json file, create an array of the 6 stats. That looks like this:
{
   "stats": ["strength", "dexterity", "constitution", "intelligence", "wisdom", "charisma"]
}Code language: JSON / JSON with Comments (json)
We have created an array, and the array contains all the stat names. Everything we want to use must be surrounded by quotes.
We save that, and go back to the handlebars file.
<div class="bio">
    <span>Name</span>
    <input type="text" name="attr_character" value="">
</div>
<div class="stats">
    <h4>Stat</h4>
    <h4>Score</h4>
    <h4>Buff</h4>
    <h4>Bonus</h4>
    {{#each stats}}
    <span>{{this}}</span>
    <input type="number" name="attr_{{this}}" value="10">
    <input type="number" name="attr_{{this}}_buff" value="0">
    <input type="number" name="attr_{{this}}_modifier" value="0">
    {{/each}}
</div>
Code language: Handlebars (handlebars)
We have added the each section. There are several things to notice here.
The each block starts with {{#each NAME}} – with name being the element in the json file – and ends with {{/each}}. When you create an each block, handlebars looks for the json file, then for the NAME, and then grabs everything in that line.
"stats": ["strength", "dexterity", "constitution", "intelligence", "wisdom", "charisma"]Code language: JSON / JSON with Comments (json)Here we have an array of attribute names. Handlebars will execute everything in the each block once per item there, and replace its name with {{this}}. This is our code:
    {{#each stats}}
    <span>{{this}}</span>
    <input type="number" name="attr_{{this}}" value="10">
    <input type="number" name="attr_{{this}}_buff" value="0">
    <input type="number" name="attr_{{this}}_modifier" value="0">
    {{/each}}
Code language: Handlebars (handlebars)
Everything in the html is just text that can be duplicated by the each block. So, Handlebars will produce a copy of the above once with each {{this}} replaced by strength, then it will go through it again, this time replacing {{this}} with dexterity, and so on until all entries are done.
After clicking Generate on the Handlebars tool, we have the HTML shown earlier. But handlebars can duplicate JavaScript too…
Building Many Sheet Workers
We have the HTML code for six attributes, but we want to link sheet workers to calculate the stat modifier, and to allow for modifiers. If we were building it without templating, we’d need to create a script block something like this:
<script type="text/worker">

    on('change:strength change:strength_buff', () => {
        getAttrs(['strength', 'strength_buff'], values => {
            const score = +values.strength || 0;
            const buff = +values.strength_buff || 0;
            const base_mod = Math.floor(score/2) -5;
            const total = base_mod + buff;
            setAttrs({
                strength_modifier: total
            })
        })
    });
    on('change:dexterity change:dexterity_buff', () => {
        getAttrs(['dexterity', 'dexterity_buff'], values => {
            const score = +values.dexterity || 0;
            const buff = +values.dexterity_buff || 0;
            const base_mod = Math.floor(score/2) -5;
            const total = base_mod + buff;
            setAttrs({
                dexterity_modifier: total
            })
        })
    });
    on('change:constitution change:constitution_buff', () => {
        getAttrs(['constitution', 'constitution_buff'], values => {
            const score = +values.constitution || 0;
            const buff = +values.constitution_buff || 0;
            const base_mod = Math.floor(score/2) -5;
            const total = base_mod + buff;
            setAttrs({
                constitution_modifier: total
            })
        })
    });
    on('change:intelligence change:intelligence_buff', () => {
        getAttrs(['intelligence', 'intelligence_buff'], values => {
            const score = +values.intelligence || 0;
            const buff = +values.intelligence_buff || 0;
            const base_mod = Math.floor(score/2) -5;
            const total = base_mod + buff;
            setAttrs({
                intelligence_modifier: total
            })
        })
    });
    on('change:wisdom change:wisdom_buff', () => {
        getAttrs(['wisdom', 'wisdom_buff'], values => {
            const score = +values.wisdom || 0;
            const buff = +values.wisdom_buff || 0;
            const base_mod = Math.floor(score/2) -5;
            const total = base_mod + buff;
            setAttrs({
                wisdom_modifier: total
            })
        })
    });
    on('change:charisma change:charisma_buff', () => {
        getAttrs(['charisma', 'charisma_buff'], values => {
            const score = +values.charisma || 0;
            const buff = +values.charisma_buff || 0;
            const base_mod = Math.floor(score/2) -5;
            const total = base_mod + buff;
            setAttrs({
                charisma_modifier: total
            })
        })
    });
</script>Code language: HTML, XML (xml)
There’s a lot of duplicated code there, and there are many ways to streamline that. But this article is about the handlebars tool, so lets see how to do it there. We’d want to include a script block like this.
<script type="text/worker">

    {{#each stats}}
    on('change:{{this}} change:{{this}}_buff', () => {
        getAttrs(['{{this}}', '{{this}}_buff'], values => {
            const score = +values.{{this}} || 0;
            const buff = +values.{{this}}_buff || 0;
            const base_mod = Math.floor(score/2) -5;
            const total = base_mod + buff;
            setAttrs({
                {{this}}_modifier: total
            });
        });
    });
    {{/each}}
</script>Code language: Handlebars (handlebars)
We have already created the array of stats, now we just want to iterate through it again. So we create another each block, and once again {{this}} is used to substitute for each stat name.
Notice how {{this}} replaces each stat exactly – see where values. is used, followed by {{this}}. Ordinarily that kind of thing would be illegal in javascript, but handlebars runs before the HTML and Javascript processor ever sees this code. You click the Generate button and get a legal HTML file ready to load in to the sandbox.
Next Steps
We could create an entire sheet with the {{#each}} block and arrays of attributes, and that will make things go faster. But there are complications (rolltemplates create a particular problem). There’s also more we can do. We’ll see what else we need to know and can do in the next few posts. By the way, the complete handlebars code for this sheet is pretty short:
<div class="bio">
    <span>Name</span>
    <input type="text" name="attr_character" value="">
</div>
<div class="stats">
    <h4>Stat</h4>
    <h4>Score</h4>
    <h4>Buff</h4>
    <h4>Bonus</h4>
    {{#each stats}}
    <span>{{this}}</span>
    <input type="number" name="attr_{{this}}" value="10">
    <input type="number" name="attr_{{this}}_buff" value="0">
    <input type="number" name="attr_{{this}}_modifier" value="0">
    {{/each}}
</div>

<script type="text/worker">

    {{#each stats}}
    on('change:{{this}} change:{{this}}_buff', () => {
        getAttrs(['{{this}}', '{{this}}_buff'], values => {
            const score = +values.{{this}} || 0;
            const buff = +values.{{this}}_buff || 0;
            const base_mod = Math.floor(score/2) -5;
            const total = base_mod + buff;
            setAttrs({
                {{this}}_modifier: total
            });
        });
    });
    {{/each}}
</script>Code language: Handlebars (handlebars)